This tutorial is the eight in the 10 part series on how to create a first person shooter game using Unreal Engine 4. We recommend you read the previous articles first to get the maximum benefit from this tutorial. In this tutorial I will be showing you how to make a simple enemy A.I to track and move towards the player.
Step 1
Start unreal engine and open your level right click on your content browser and make a new folder, mine will be called ZombieAI and within that folder right click and create a new blue print, use the search function to type in AIController as the blueprint class and click select it to create the blueprint. Name the blueprint ZombieAI and click 'Save All'.
Step 2
Double click the ZombieAI blueprint and open the event graph tab. You can delete the event tick as we wont be using it. Then right click and search for add custom event once you place it you have to name call it TrackPlayer.
 |
| Add a custom event and call it TrackPlayer |
Then right click and search for AI move to and connect the white arrows together.
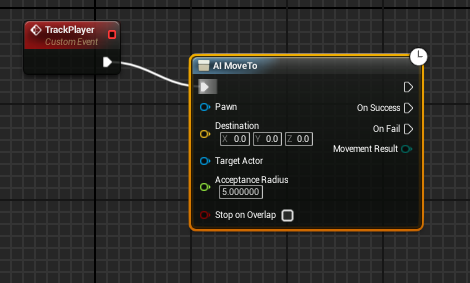 |
| Connect the TrackPlayer event to the AI Move To node |
Then right click and search for get controlled pawn connect the blue arrow to the pawn on the AI Move To. Then right click and search for get player character and connect the blue arrow to the Target actor on AI Move To.
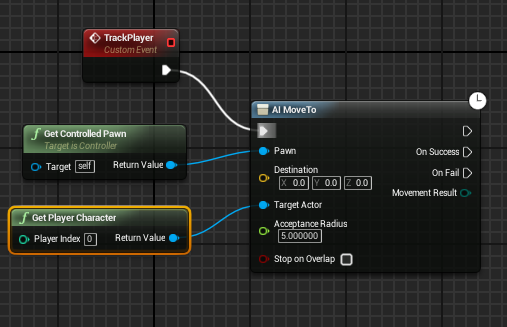 |
| Connect up Get Controlled Pawn and Get Player Character to the AI Move To node |
Next, beside the Event begin play right click and search for set timer by function name and connect the white arrow of the event begin play to the set timer and in the function name section type in TrackPlayer change the time to 1 and click the looping option then hit compile and save.
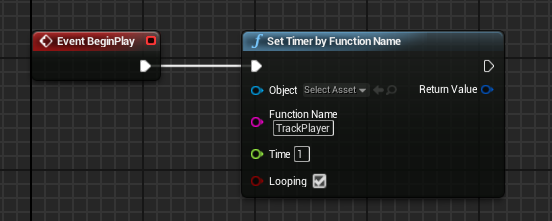 |
| Connect EventBeginPlay to a Set Timer by Function Name node |
Step 3
Now go back to the ZombieAI folder, right click and create a new blue print this time chose the character class and call it ZombieCharacter. Double click it to open it up and in the class default details section under pawn change the AI Controller to the ZombieAI that we just made.
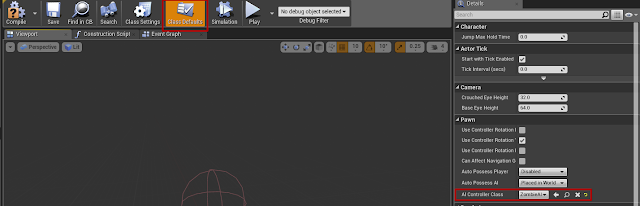 |
| Change the AI Controller to ZombieAI |
Then while in the components window, under the capsule component, click on the mesh and change the skeletal mesh to the zombie mesh we imported in the last tutorial.
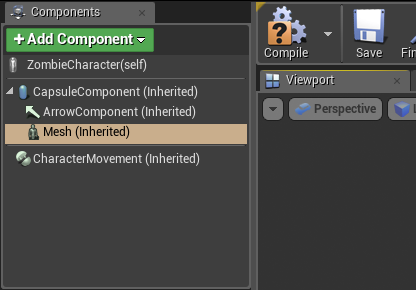 |
| Select the Mesh |
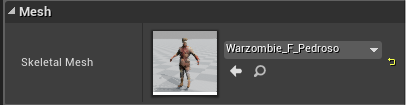 |
| Change the skeletal mesh to the zombie mesh imported in the previous tutorial |
Be sure to move it down until its feet are at the bottom of the capsule, then double click the capsule and change the height in the settings to 110. Finally, click the rotate tool and rotate the character until it faces the same direction as the blue arrow.
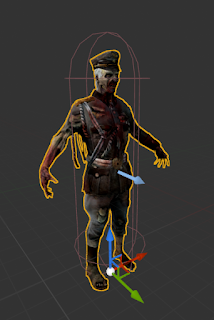 |
| Move the mesh so it's feet line up with the bottom of the capsule |
Step 4
Now, in the components window, click on the character movement component and change the max acceleration to 1024 and the max walk speed to 375 as its default speed it way too fast.
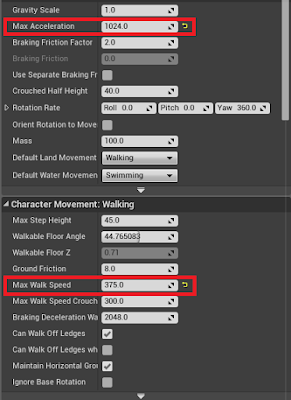 |
| Change the settings of the character movement component |
Step 5
Finally under the animation section of the character mesh, select the animation blueprint we made in the last tutorial (ZombieAnimation) and hit compile and save.
 |
| Change the animation blueprint |
Just one move thing needs to be done so that our AI character will chase after the player and that is to add a Nav mesh. You can find the Nav mesh in the volumes section of the Place tab.
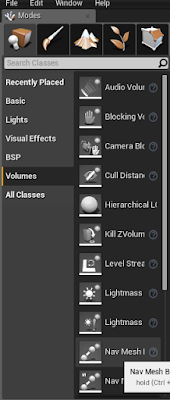 |
| Find the Nav Mesh in the volumes section of the Place tab |
To put it in the level just drag and drop it into the level and re-size it to cover the area you want your AI to move in. You can hit P to highlight the area the nav mesh covers.
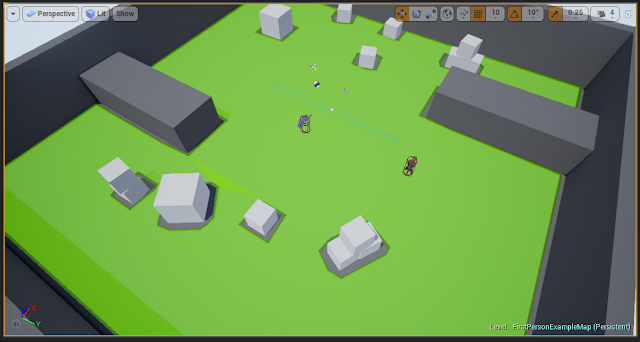 |
| The green area shown is the navigable area of the AI created by the Nav Mesh |
After you have done all this you can just drag your AI character into the level and when you hit play it will chase after the player.
As you can the zombie was put in the main game and now coming after you. Now its your turn to do this in your game.
Next Up
Now that the enemy AI is set up we can shift our attention to the game UI Screens, starting with the game Start Screen (menu)!


 Reviewed by Opus Web Design
on
February 13, 2016
Rating:
Reviewed by Opus Web Design
on
February 13, 2016
Rating:


