UE4 Start Screen UI
Creating The UI Widget Blueprint
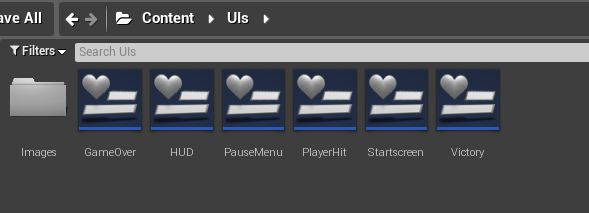
In your Content Browser in the Content folder create a folder called "UIs". This will be useful as you will likely want to create multiple other UI screens such as a pause screen or in game HUD.
In your newly created UIs folder right click and in the "Create Advanced Asset" section go to User Interfaces and create a Widget Blueprint and call it "Startscreen" or something similar so it's easily identifiable later.

There will be a little asterisk on the Blueprint, this means that it hasn't been saved yet, so click the save all button just above it. You can create as many more of these widget blueprints that you think you will need and name them something appropriate to their purpose, see the example below. As before be sure to select save all.
The Widget Blueprint Editor
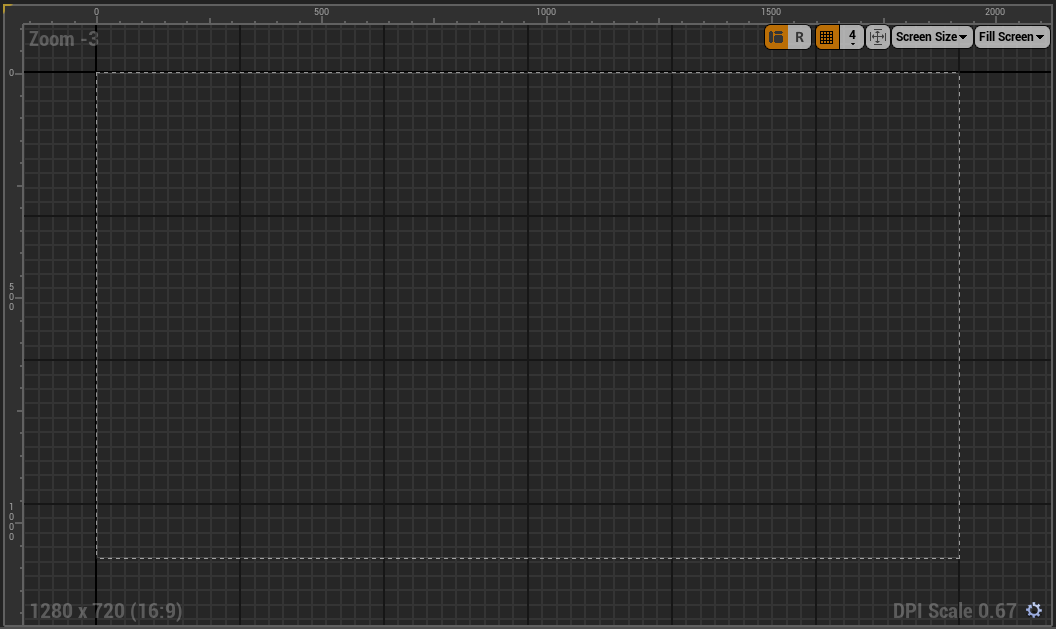
Double click your startscreen UI and you should be presented with a screen like this. This is Unreal Engine's UMG Widget Editor. |
| The UI Widget Blueprint Editor |
On the left you will see the palette panel. This is where you get the various objects such as images, buttons, text boxes, progress bars etc. that we will use in our UI. Below it is the Hierarchy panel which is where we will add, layer and group any objects from the palette panel that we use.

In the middle you have the the viewport. Anything within the dotted line will be displayed on your screen.
On the right you have the details panel (when in designer view) . This is used to change the properties on the various things you have in your viewport. The details panel will change depending on what you have selected, as different things have different properties. It will start off blank because we have yet to add or select any objects. Beside the designer tab is the Graph view which will open up in a separate window if selected. It is also blank to start off with.

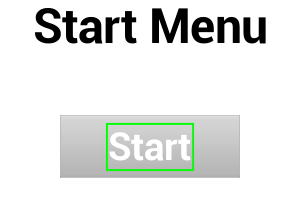
Adding The Background Image
In the Palette Panel drag the "Image" widget onto the Canvas Panel in the Hierarchy Panel below the Palette Panel. It is very important you drop into directly onto where it says [Canvas Panel].
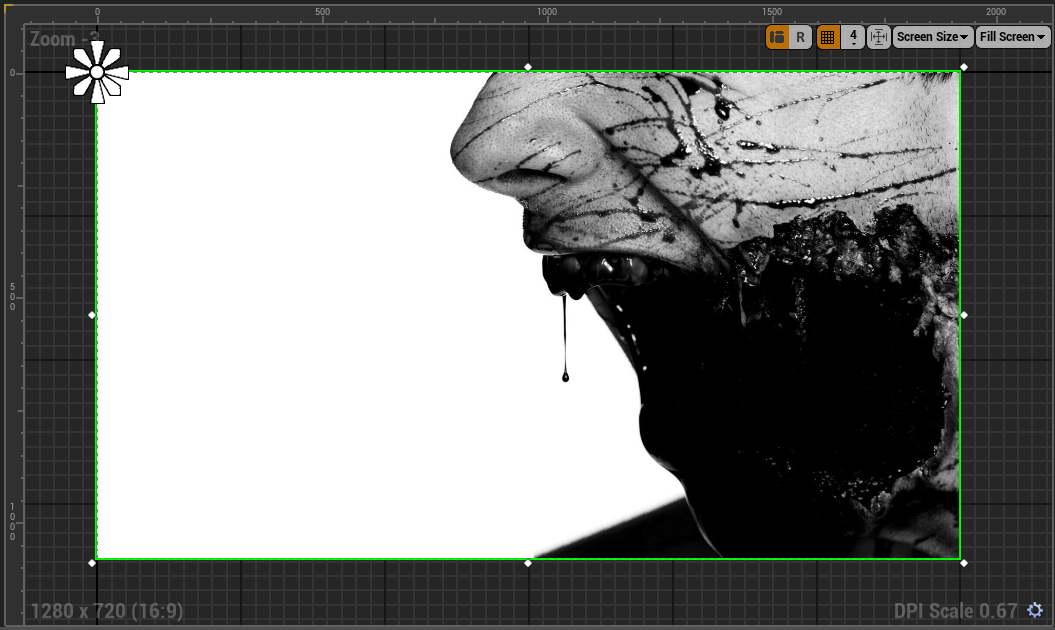
You should now see a small white rectangle in the top left of the viewport. When selected it should get a green outline and you have the ability to drag the various points along the sides in order to re-size it.
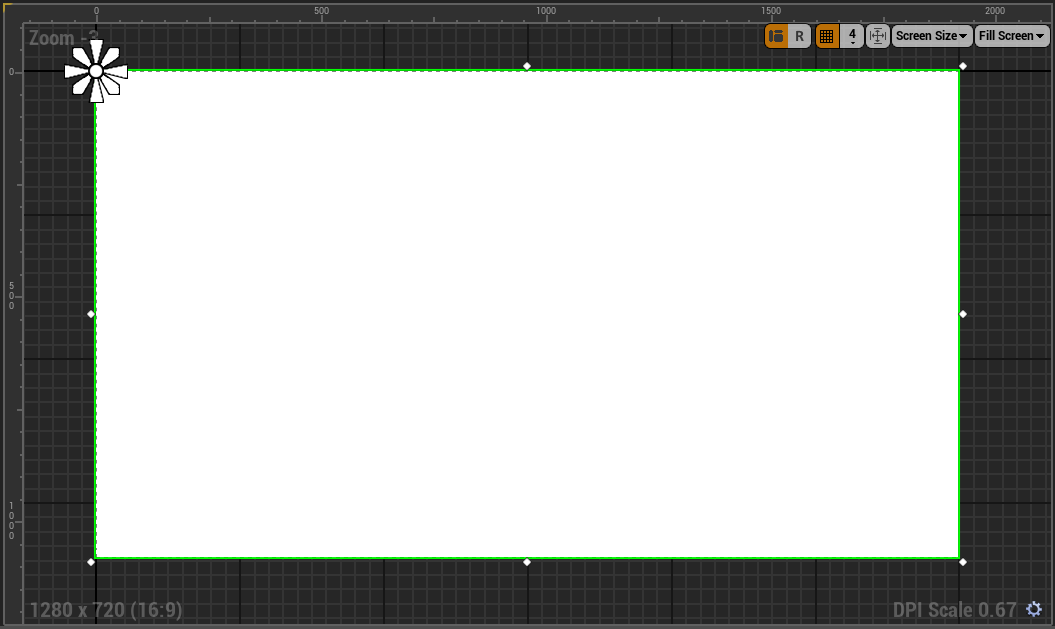
Drag the bottom right point so the image widget fills the screen size, indicated by the dotted line inside the viewport.
On the top left of the UMG Editor click compile and then click save. The Yellow/orange question mark on the compile icon should change to a green tick.
You can now minimize the Editor for a moment and go back to the Unreal Editor Content Browser. In your UIs Folder create another folder and call it "Images".
Find or create an image you want to use as the background for your start menu and save it on your computer. Open the newly created images folder in Unreal Engine and drag and drop your chosen image into the folder alternatively you can click the import button in the folder to add the image.

Hit the Save All button again. You can now go back in the StartScreen Blueprint Editor.
Select the image widget and in the Appearance section of the Details panel find where it says "Brush" and click the little drop down icon.
Select the image widget and in the Appearance section of the Details panel find where it says "Brush" and click the little drop down icon.
Select the drop down next to where it says "Image" and scroll through the list until you find the image you just imported.

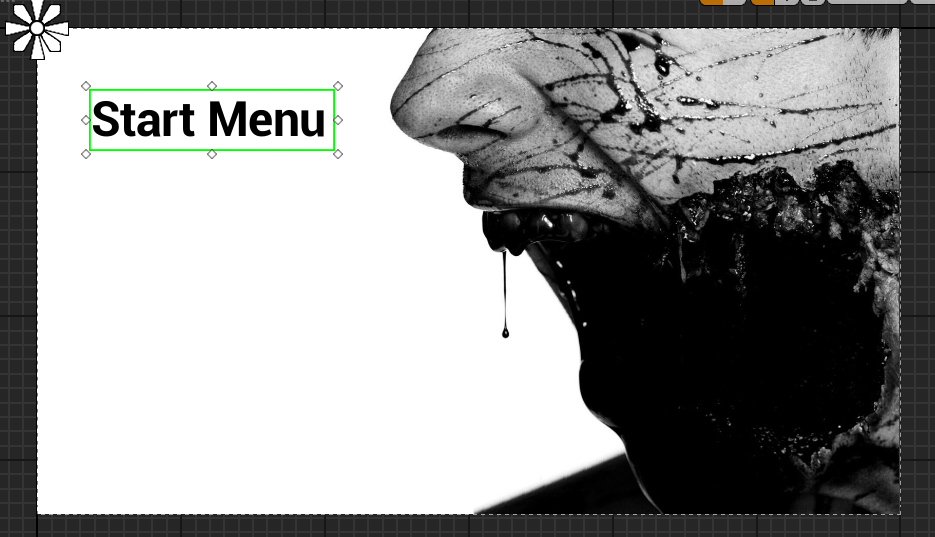
Now the large white image widget in the viewport should change to the image you selected.
 |
| The background image added to the StartScreen UI |
Adding The Menu Text
In the Palette Panel drag the "Text" widget (not the Text box) on to the [Canvas Panel].
Select the text widget on the top left of the viewport and re-size and move it to your liking.
With the text widget selected you can change the colour, font, size etc. in the Details panel. I'm going to change mine to black so we can see the changes. To change the colour click on the white bar next to where it says "Color and Opacity" and it will open a small window where you can change the colour.
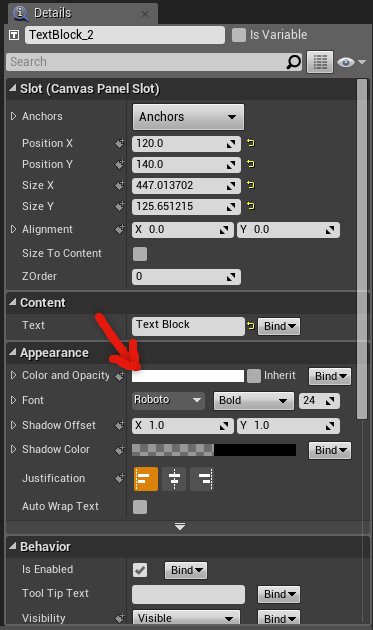
I have changed my text colour to black so that you can see it.
In the Details Panel in the "Content" section there is a white bar that says "Text Block". Erase that and type in whatever you want the text block to say.
In the appearance section in the Details Panel Find where it says "Font" and to the right of that you'll see the number 24. This is the size of the font, change this to the size you want. I have set it to a size of 80.
In the appearance section in the Details Panel Find where it says "Font" and to the right of that you'll see the number 24. This is the size of the font, change this to the size you want. I have set it to a size of 80.
 |
| The title text added to the StartScreen UI |
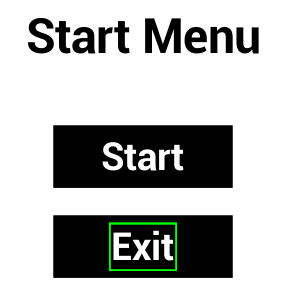
Adding The Menu Buttons
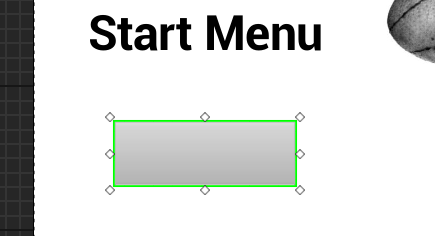
In the Palette Panel drag and drop a "Button" widget onto the [Canvas Panel] in the Hierarchy Panel in the same way as we did with the image and text objects.
Select the button from the top left of the viewport and re-size and reposition it to your desired location.
 |
| The start button added to the StartScreen UI |
In the Details Panel drag and drop the "Text" widget onto the "Button" you just added. This will allow you to put text on the button and keep them grouped together for easier editing. Your Hierarchy Panel and your button should look something like this.
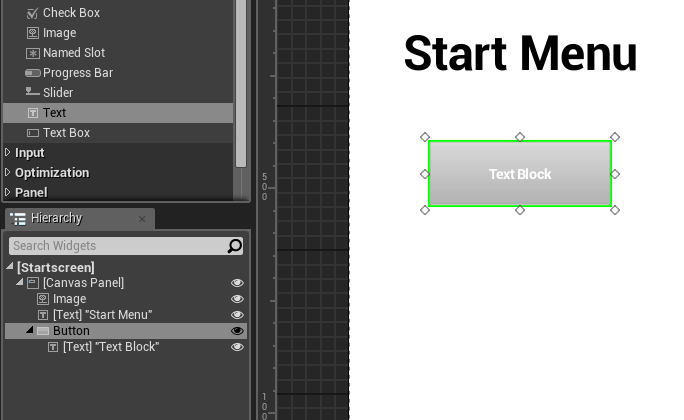
By clicking on the text in the Hierarchy Panel you can edit it in the same way as we did for the "Start Menu" text
If you select the button, you can change the colour of it in the Details Panel in the appearance section if you click the white bar next to where it says "Background color".
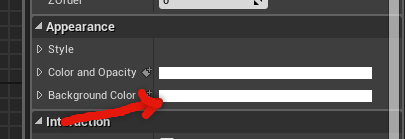
I'm making mine black to keep consistent with the black and white theme going
In the Hierarchy Panel click the button widget you made and copy and paste it onto the [Canvas Panel]. Move it to the desired location. You should now have to identical looking buttons.
Simply change the text on the second button to "Exit".
Programming The Menu
First select your "Start" button and scroll down to the bottom of the Details Panel so you can see the "Events" section and click the green bar next to where it says "OnClicked".
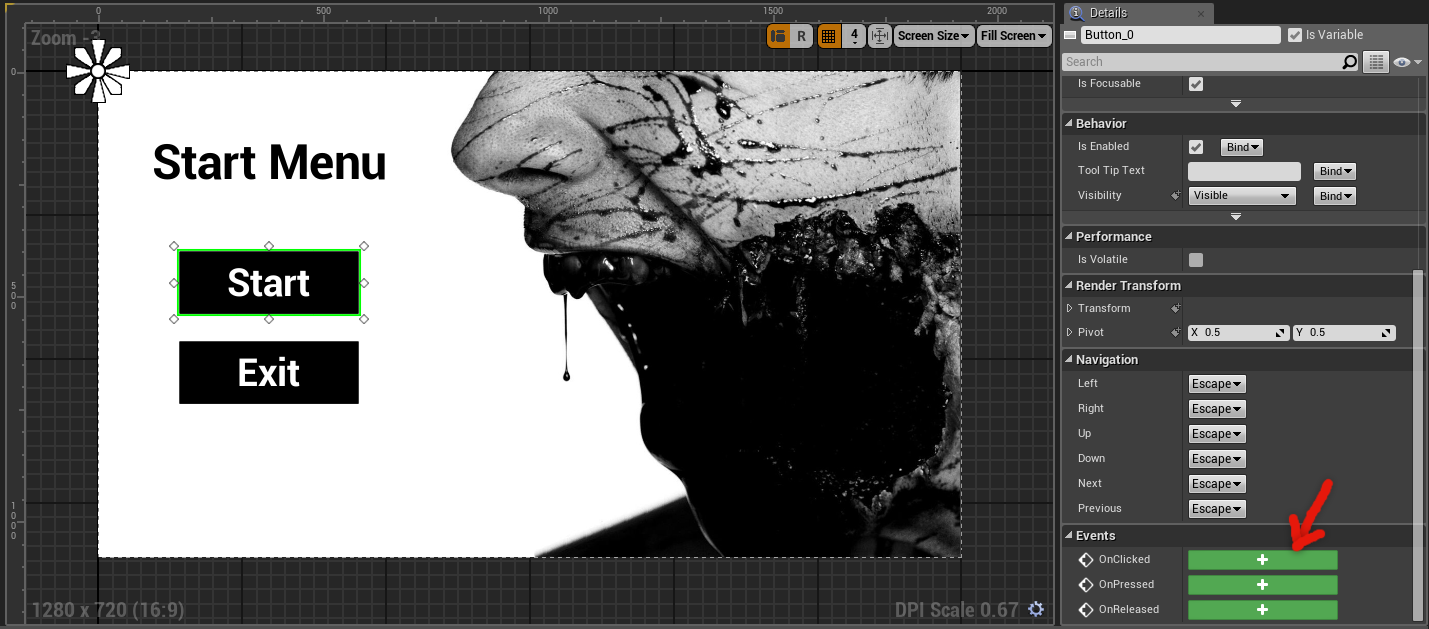
This will automatically open up the graph editor view and create an OnClicked event node for the Start button.
Drag a wire out from the white pin on the OnClicked node and search for "Open level" and select it.
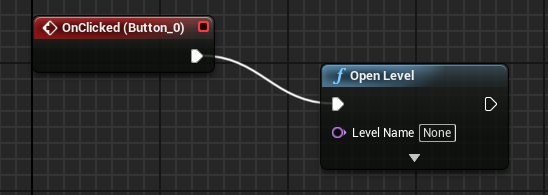
In the text box where it says "none" type in the name of the level for your game. You can find the this level in the content browser Content > FirstPersonBP > Maps. As I am using the First Person Shooter Template my map is called FirstPersonExampleMap, but yours may be different.
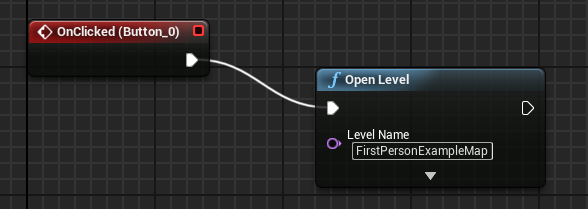
Hit compile and save. On the top right of the blueprint editor select "Designer" mode. This will take you back to the widget editor.
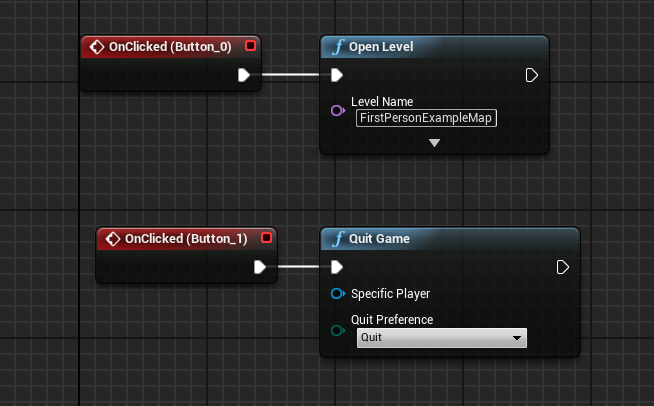
Now select the "Exit" button and again create an "OnClicked" event. Once again you will automatically jump into the Graph editor. Drag a wire out from the new Onclicked event node and search for "Quit Game" and select it. Then hit compile and save.

Your Graph editor should now look like this.
Creating & Programming The Menu Level
Now that we have the start screen set up it's time to create a level for it to be place on. Compile and save your Start screen then close the editor. Back in Unreal Engine go to the file path: Content > FirstPersonBP > Maps (will be different on different game templates). Here you will find your map. Right click in empty space and create a new level and call it something appropriate like "startscreen".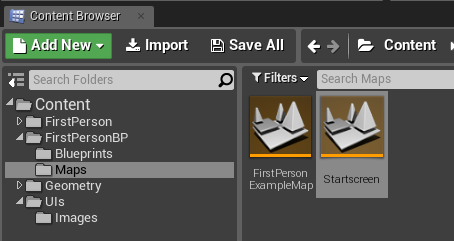
Double click the new level you just made. When it opens, your preview window should be completely black.
Above the preview window, select the blueprints drop down menu and select "open level blueprints".

You should then be presented with a screen similar to the Graph editor view from the StartScreen blueprint. This is Unreal Engine's Level Blueprint editor.
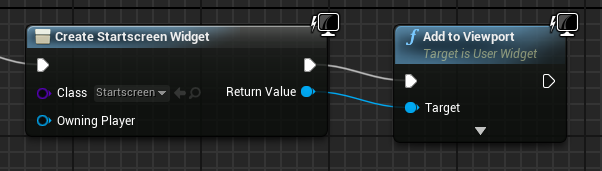
From the white pin on the Event BeginPlay node drag out a wire and a drop down will appear. Type "create widget" in the search bar and select it.

On this node click the drop down where it says "Select class" and select your start screen from the options.

From the white pin on the widget node drag out a wire and type "add to viewport" and select it. Then drag a wire from the "return value" pin on the widget node and plug it into the "target" pin on the viewport node.
Drag a wire from the whit pin on the viewport node and type "set show mouse cursor". The list should be empty now. Click the little "Context Sensitive" check box to get the node.

On this node make sure to click the check box next to where it says "Show mouse cursor".
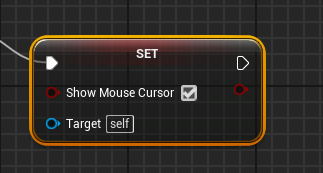
Drag out a wire from the "target" pin on the show mouse cursor node. Make sure to turn Context Sensitive back on. Type "get player controller".
You are now finished with this stage of programming so hit compile and save. It should look like this. After compiling and saving your code you can close the Level Blueprint Editor.
 |
| The completed menu code on the Level Blueprint of the Startscreen Level |
Editing The Project Settings
The final step is to edit the project settings to make the Startscreen Level the game default map. This will ensure when the game is packaged and plays that the menu opens up first, otherwise the player would skip straight into the game and all our hard work in creating a menu would be wasted!
Go to File > Project Settings. In the window that pops up select the Maps & Modes option on the left.
In the "Default maps" section select the drop down and set them both to your startscreen level.

You can close this window now because it automatically saves. You have now completed the Startscreen UI tutorial, so just save your project and your done!
UE4 Start Screen UI
 Reviewed by Opus Web Design
on
February 13, 2016
Rating:
Reviewed by Opus Web Design
on
February 13, 2016
Rating:
Reviewed by Opus Web Design
on
February 13, 2016
Rating:


